
Master the coffee tasting workflow: guide for home enthusiasts
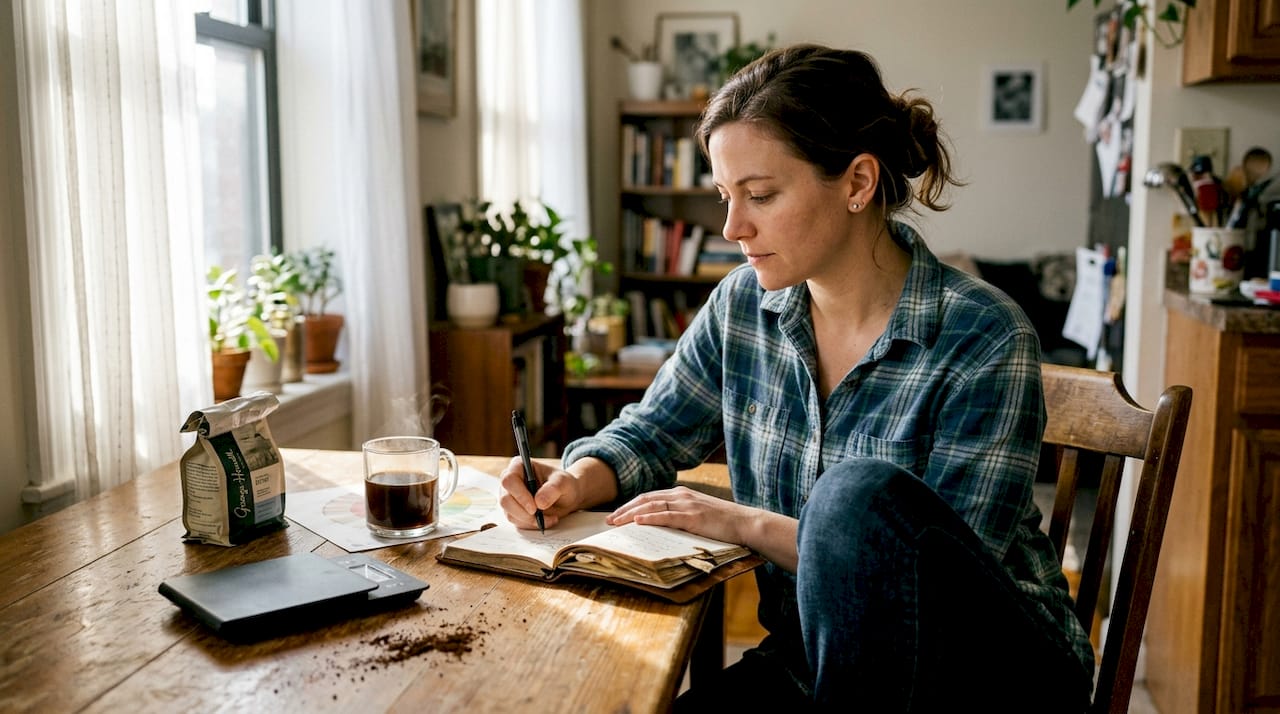
You grind a beautiful single-origin Ethiopian Yirgacheffe, brew it carefully, take a sip, and think: “It tastes like… coffee.” That frustration is more common than you’d think. Specialty Arabica beans carry dozens of distinct flavor notes, from bright citrus to dark chocolate to delicate jasmine, but without a structured approach, those nuances blur into a single undifferentiated cup. A defined coffee tasting workflow changes that. It gives you a repeatable process that trains your palate, sharpens your attention, and turns every brew into a genuine discovery. This guide walks you through every step, from setup to interpretation, so you can taste with real confidence at home.
Table of Contents
- Why a coffee tasting workflow matters
- What you need: Tools and setup for a flawless tasting
- The coffee tasting workflow: Step by step to expert results
- Troubleshooting and avoiding common tasting pitfalls
- Interpreting your results: Building home expertise
- Continue your coffee journey with House Coffee
- Frequently asked questions
Key Takeaways
| Point | Details |
|---|---|
| Structured workflow benefits | Following a set coffee tasting process reveals richer flavors and more reliable bean comparisons. |
| Essential tools and steps | Precise equipment and a distraction-free routine are vital for accurate home tastings. |
| Common pitfalls to avoid | Skipping steps or using inconsistent variables can prevent full coffee appreciation. |
| Flavor mastery over time | Regular tastings and note-taking develop your palate and enjoyment of specialty coffee. |
Why a coffee tasting workflow matters
Most home coffee lovers rely on instinct. They taste, they enjoy (or don’t), and they move on. The problem is that instinct without structure doesn’t improve. A defined workflow is what separates a casual drinker from someone who can actually articulate why one bean tastes brighter or more complex than another.
A structured process trains your palate over time by giving it consistent reference points. Each time you follow the same steps, you build a mental library of aromas, textures, and flavors. That library grows with every tasting session.
Workflow also ensures fair comparisons. If you taste two beans using different water temperatures, grind sizes, or timing, you’re not comparing the beans. You’re comparing your inconsistencies. Professional coffee cupping follows a stepwise method for consistency and quality assessment, and home enthusiasts benefit from the same discipline.
Here’s what a solid workflow delivers:
- Repeatable results you can compare across sessions
- Clearer flavor identification as your palate sharpens
- More confidence when selecting and brewing new beans
- Deeper enjoyment because you understand what you’re tasting
- Better purchasing decisions based on what you actually prefer
Our guide for tasting at home and specialty coffee tasting tips are great companions to this workflow as you build your practice.
“The difference between tasting and truly perceiving coffee is structure. Without a repeatable process, you’re guessing. With one, you’re learning.”
Now that you know the potential benefits, let’s examine exactly what tools and preparations are essential for an authentic coffee tasting at home.
What you need: Tools and setup for a flawless tasting
Gear doesn’t have to be expensive, but it does have to be consistent. Selecting the right materials like scales and neutral cups removes variables from the tasting process. When variables disappear, the bean’s true character emerges.
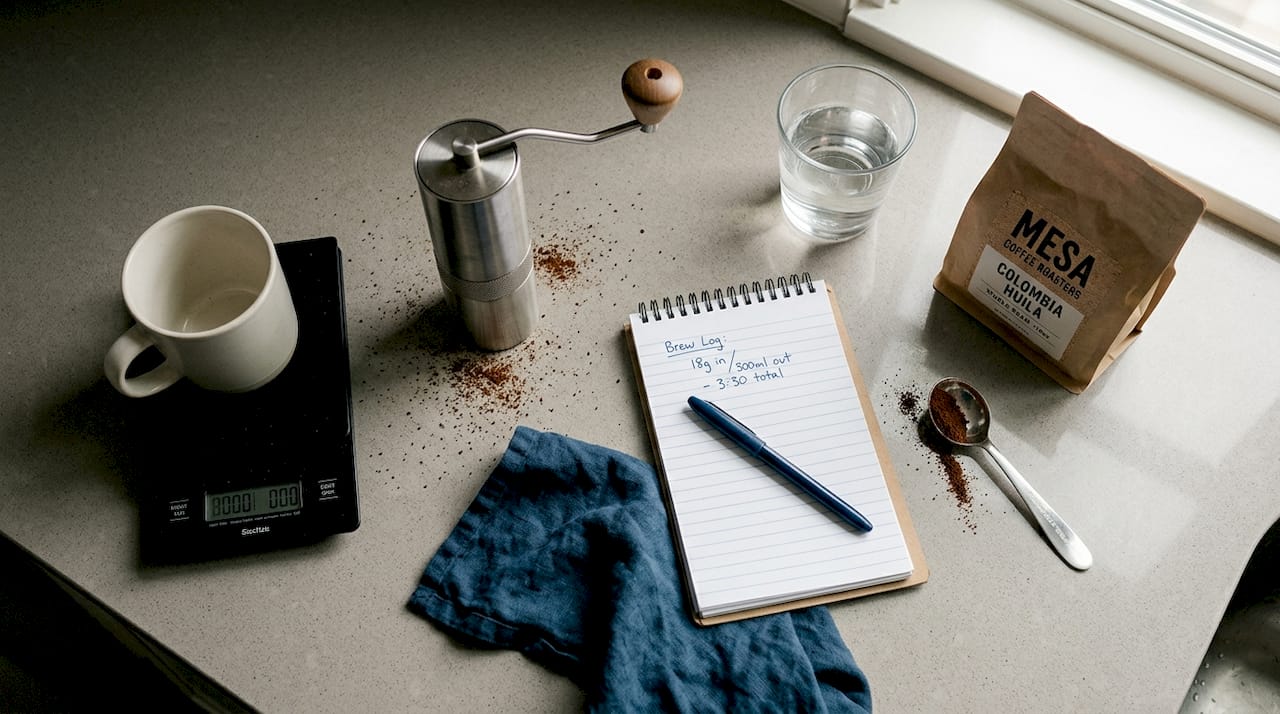
Here’s what’s essential versus optional:
| Item | Essential or optional | Why it matters |
|---|---|---|
| Digital microscale (0.1g precision) | Essential | Ensures consistent coffee-to-water ratio |
| Gooseneck kettle with thermometer | Essential | Controls water temperature precisely |
| Burr grinder | Essential | Produces uniform grind size |
| Neutral white cups (6 oz) | Essential | Avoids flavor interference from materials |
| Cupping spoons | Recommended | Designed for slurping and aeration |
| Tasting notebook | Recommended | Tracks impressions and progress |
| Palate cleansers (water, plain crackers) | Optional | Resets your palate between samples |
| Aroma reference kit | Optional | Accelerates flavor vocabulary development |
Beyond gear, your environment matters. Taste in a room free from strong cooking smells, perfume, or cleaning products. Those scents compete with the coffee and muddy your perception. Natural light helps too, since color can influence how you perceive flavor.
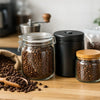
For bean selection, always use freshly roasted, single-origin Arabica. Blends are designed for balance, which makes them harder to analyze. Single-origin beans have a defined flavor story. Knowing how to select coffee beans for tasting is its own skill, and understanding what cupping in coffee actually means will help you appreciate why each step exists. You can also explore a broader range of coffee equipment options if you want to expand your home setup.
Pro Tip: Grind your coffee no more than 15 minutes before tasting. Freshly ground coffee releases aromatics rapidly, and those aromatics are your first and most important data point.
With your setup ready, you can move confidently into the guided step-by-step workflow for professional-style tasting at home.
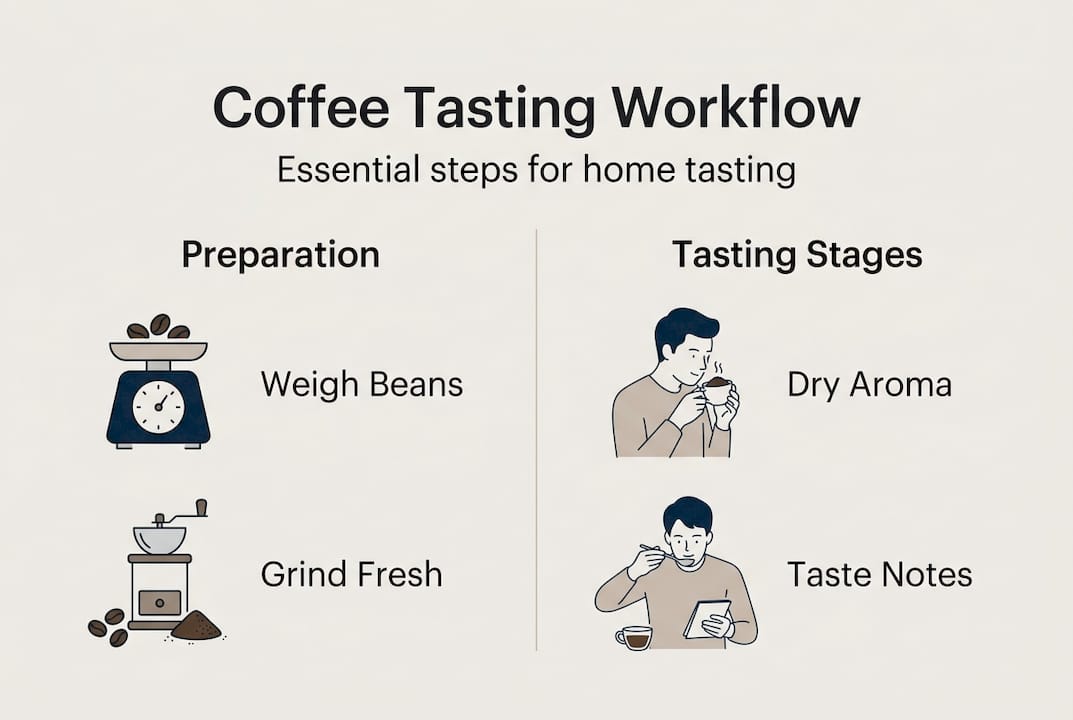
The coffee tasting workflow: Step by step to expert results
This is where the real work happens. Follow these steps in order every time. The correct order and timing including smelling, brewing, breaking the crust, waiting to cool, and slurping yield objective flavor assessment.
- Smell the dry grounds. Before adding any water, lower your nose to the cup and inhale slowly. Note whether you detect fruit, earth, nuts, or floral tones. Write it down immediately. This is your baseline.
- Add water at 93°C (200°F). Pour in a slow, even spiral to saturate all the grounds. Use a ratio of roughly 8.25g of coffee per 150ml of water. Start your timer.
- Steep for 4 minutes without stirring. A crust of grounds will form on the surface. Don’t touch it yet. Let the coffee extract fully.
- Inhale the wet aroma. Before breaking the crust, lean in and smell the steam rising from the surface. The wet aroma often reveals notes that weren’t present in the dry grounds.
- Break the crust with three slow stirs. Use the back of your spoon and push the crust gently from one side to the other. Inhale deeply as you do this. The aroma release at this moment is intense and revealing.
- Skim the foam and grounds from the surface. Use two spoons to remove the floating material. This clears the cup for clean tasting.
- Wait until the coffee cools to around 71°C (160°F). This takes roughly 8 to 10 minutes. Tasting too hot numbs your palate and hides flavor complexity.
- Slurp the coffee from your spoon. A loud, deliberate slurp aerates the liquid and spreads it across your entire palate. This is how tasting flavors like an expert actually works. Note sweetness, acidity, body, and finish.
Here’s a quick reference for what to notice at each stage:
| Tasting stage | What to focus on | Common descriptors |
|---|---|---|
| Dry aroma | First impressions, intensity | Floral, earthy, nutty, fruity |
| Wet aroma | Depth, complexity | Caramel, berry, citrus, spice |
| Crust break | Aroma shift, brightness | Bright, muted, layered |
| First sip (hot) | Body, initial acidity | Heavy, light, sharp, smooth |
| Cooled sip | Full flavor, sweetness, finish | Chocolate, stone fruit, clean, lingering |
Pro Tip: Taste the same coffee at three temperature points: hot, warm, and cool. Flavor profiles shift dramatically as coffee cools, and coffee cupping accuracy improves significantly when you evaluate across the full cooling range.
Once you’re comfortable with the step-by-step method, it’s helpful to understand and troubleshoot common mistakes and misconceptions.
Troubleshooting and avoiding common tasting pitfalls
Even experienced tasters make mistakes. The good news is that most errors are predictable and easy to fix once you know what to look for.
Consistent workflow is key, and skipping steps or improper cooling can skew results significantly. Here are the most common pitfalls:
- Skipping the dry aroma step. This is your only chance to smell the coffee before water changes everything. Missing it means losing a critical layer of information.
- Using inconsistent grind size. Uneven grinds extract at different rates, producing a muddled cup that doesn’t represent the bean accurately.
- Tasting too hot. Heat suppresses sweetness and acidity. If your tongue feels scalded, you’re tasting too early.
- Palate fatigue. Tasting more than four or five coffees in a single session without cleansing your palate leads to sensory blur. Use plain water and a neutral cracker between samples.
- Environmental contamination. Strong smells from nearby food, candles, or cleaning products will interfere with your aroma perception. Always taste in a neutral space.
- Inconsistent water temperature. Water that’s too hot (above 96°C) over-extracts and creates bitterness. Too cool (below 90°C) under-extracts and produces flatness.
“Your environment is part of your equipment. A distracted or scent-polluted tasting space is just as damaging as a broken grinder.”
Our coffee selection guide can also help you avoid starting with beans that are too old or poorly stored, which is one of the most overlooked sources of tasting error.
After troubleshooting, it helps to know what expert-tuned results look like and how to track your progress.
Interpreting your results: Building home expertise
Following the workflow is step one. Understanding what your results mean is where real expertise develops. Waiting for coffee to cool before tasting unlocks full flavor perception, and that patience pays off in richer, more accurate notes.
Here’s how to build a meaningful tasting record:
- Rate each attribute on a simple 1 to 10 scale. Aroma, acidity, body, sweetness, and finish are the five core dimensions. Scoring them consistently lets you compare coffees objectively over time.
- Use specific descriptors, not vague ones. “Fruity” is a starting point. “Dried apricot with a hint of tamarind” is a data point. Push yourself toward precision.
- Note the origin and roast date. Single-origin Arabica from Ethiopia will taste very different from one sourced in Colombia or Guatemala. Tracking origin helps you identify your preferences.
- Revisit the same bean twice. Taste it once at peak freshness (7 to 14 days post-roast) and again at 21 days. The flavor evolution is often surprising and always educational.
- Compare your notes session to session. Over time, you’ll notice your vocabulary expanding and your ability to detect subtle notes improving. That’s your palate developing.
Understanding flavor profiles in depth will accelerate this process. Specialty Arabica typically expresses notes across a wide spectrum: bright citrus and berry from East African origins, caramel and stone fruit from Central American beans, and earthy chocolate tones from Indonesian varieties.
Pro Tip: Keep a dedicated tasting journal, either physical or digital. After six months of consistent sessions, flip back to your earliest entries. The contrast between your first notes and your current ones is one of the most motivating things you’ll experience as a home enthusiast.
Ready to take your skills and beans to the next level? Here’s how you can continue your journey with recommended resources and products.
Continue your coffee journey with House Coffee
You now have a complete, professional-grade tasting workflow you can run at home with any specialty bean. The next step is putting it into practice with coffee that’s actually worth tasting. At House Coffee, we source single-origin Arabica beans from dedicated growers around the world, roasted fresh and shipped to your door.
Whether you’re ready to explore specialty coffee across our curated collections or want to learn more about what makes a great cup before you buy, our specialty coffee page is the right place to start. For those who brew by drip or filter, our one-kilo coffee beans for drip are an excellent choice for extended tasting sessions. Every bag comes with origin details and tasting notes so your workflow has a strong foundation from the very first pour.
Frequently asked questions
Why is it important to let coffee cool before tasting?
Cooling unlocks full flavor clarity and makes subtle notes far easier to perceive and evaluate. Heat suppresses sweetness and acidity, so tasting too early gives you an incomplete picture.
Can I use regular kitchen equipment for a coffee tasting workflow?
Basic kitchen tools can work as a starting point, but precision gear like scales and neutral cups significantly improve tasting consistency and reduce variables.
How do I identify flavor notes during tasting?
Start by smelling dry and wet grounds, then slurp cooled coffee to spread flavors across your palate and compare what you detect to common descriptors like fruit, floral, or nutty.
What common mistakes should I avoid during coffee tasting?
Avoid skipping steps like smelling and cooling, and always use consistent grind size and water temperature to prevent masked or distorted flavors.
Recommended
-
Posted in
coffee tasting workflow, en


